Orchid Greenhouse Zones: Low-Tech Microclimate Setup
By Takumi Sato • 23rd Mar
Why Orchid Greenhouse Microclimates Matter More Than You Think
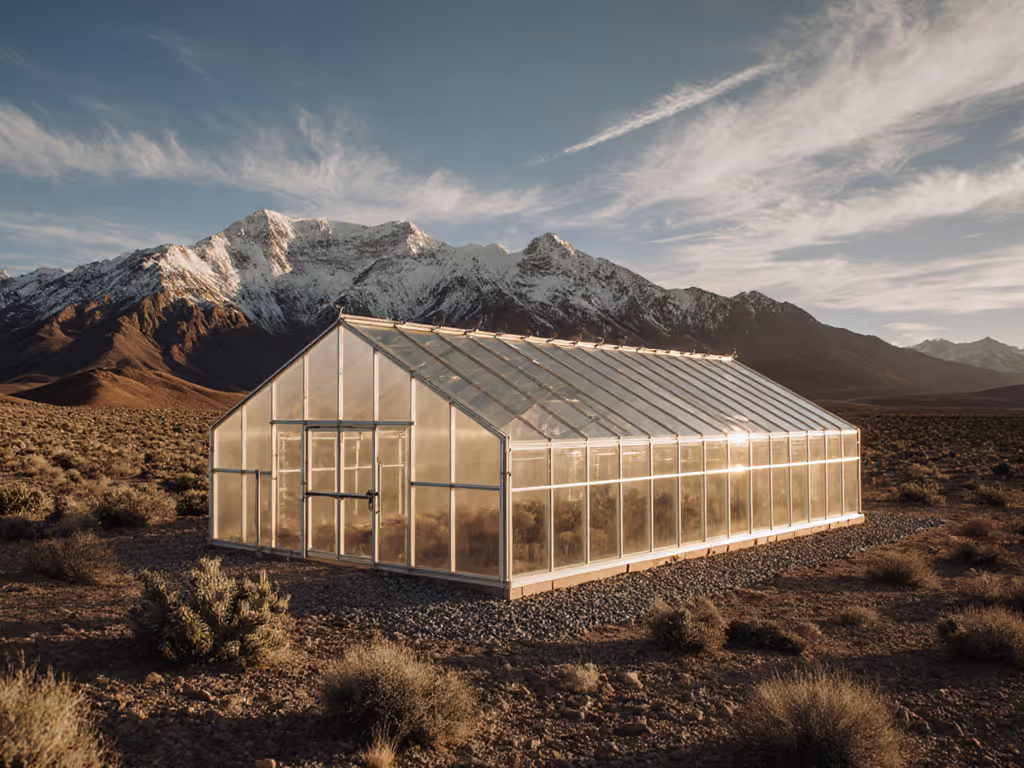
Orchid greenhouse microclimates are not a luxury - they're a structural necessity. Unlike tomatoes or lettuce, orchids don't tolerate averaging. They don't shrug off a failed day. They respond to failure with root rot, bud drop, or disease. The gardeners who succeed don't fight this reality; they design around it.
Most growers assume a single climate zone works for all orchids. It doesn't. A Phalaenopsis thriving at 68°F and 65% humidity will fail 10 feet away in a Vanda-friendly hot zone at 78°F and 45% humidity. The difference isn't preference - it's the margin between dormancy and thriving. Strong enough is not enough. You need zones that match biology, not convenience.
The good news: building low-tech zones requires no electronics, no fail-prone sensors, and no subscription service. It requires observation, simple airflow management, and understanding how light, temperature, and humidity interact in your specific greenhouse footprint. If you’re new to zoning, start with our step-by-step microclimate zoning guide tailored to small greenhouses.
FAQ: Orchid Greenhouse Microclimate Fundamentals
What exactly is a microclimate, and why can't I just heat or cool the whole greenhouse equally?
A microclimate is a localized environment with distinct temperature, humidity, light, and airflow characteristics - often just 3-4 feet apart. Your greenhouse ceiling is warmer than the floor. Your north wall is shadier and cooler. A shelf next to a vent loses humidity; a corner without airflow builds it.
Attempting uniform conditions across an entire greenhouse is like trying to anchor a structure to soil that slopes. You'll fight physics every day. Instead, map reality and build zones that leverage it.
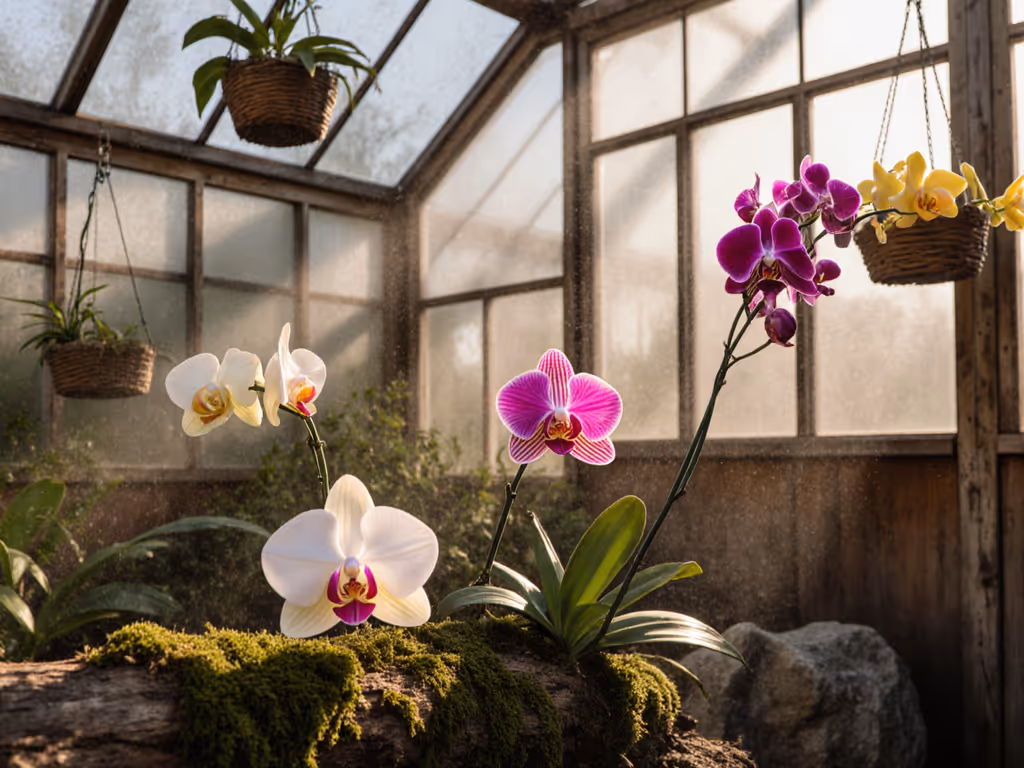
Orchids native to cloud forests (Phalaenopsis, Paphiopedilum) need cooler, humid, low-light zones. Warm-region orchids (Vanda, Oncidium) need hotter, drier, high-light zones. Jamming both into one 65-75°F space satisfies neither. One thrives; the other survives, then fails quietly.
How do I identify where my greenhouse naturally creates different zones?
Don't guess. Map it over one week using a cheap digital thermometer and hygrometer:
- Take hourly readings at five locations:
- Upper shelf near a vent
- Lower shelf, center
- North wall (shadiest)
- South-facing wall (sunniest)
- Corner opposite any fan
-
Log time, temperature, and humidity at each spot. By day 3, patterns emerge.
-
Observe light intensity visually: Is morning sun direct? Does midday sun hit the south wall hard? Does the north wall stay dim all day?
-
Test airflow with a single strand of hair near each plant. It should sway gently, not whip, not stay motionless. Stagnant air kills orchids as fast as no water does.
What you'll likely find: your greenhouse has a naturally hot, bright zone (southeast/south), a cool, dim zone (north), and intermediate zones in between. That's your starting blueprint. Overbuild once; sleep through the wind warnings at night (apply the same rigor here that you'd use for foundation placement). The data is your insurance.
What humidity and temperature zones do different orchid types actually need?
Here's the critical distinction: it's not just temperature - it's vapor pressure deficit (VPD), the gap between how much moisture the air holds and how much it could hold.
High-VPD zone (warm, moderately humid):
- Vanda, Renanthera, Arachnis
- Temperature: 75-85°F daytime; 65-70°F night
- Humidity: 40-50%
- Light: 4,000+ foot-candles (very bright)
- Purpose: heat-loving, high-light orchids that evolved near sea level in full wind
Low-VPD zone (cool, humid):
- Phalaenopsis, Paphiopedilum, Miltoniopsis
- Temperature: 65-75°F daytime; 55-65°F night
- Humidity: 60-70%
- Light: 1,500-2,500 foot-candles (bright, indirect)
- Purpose: forest-floor orchids from misty, shaded elevations
Intermediate zone:
- Cattleyas, Dendrobiums, Oncidiums
- Temperature: 70-80°F daytime; 60-68°F night
- Humidity: 50-60%
- Light: 2,500-3,500 foot-candles (moderate to bright)
The night-time drop matters enormously; it triggers blooming in many orchids and prevents fungal proliferation. Don't skip it. A greenhouse that stays 75°F day and night year-round produces vegetative growth and mold, not flowers.
How do I actually control humidity without expensive equipment?
Humidity isn't magic. It's water vapor in air, and you control it with three low-tech levers:
1. Evaporative surfaces: Place orchids on a pebble tray filled with water so pot bases sit just above the waterline. Evaporation from the gravel raises localized humidity 5-10% without wetting foliage. Group 3-5 plants together - clustering amplifies the effect more than spacing them out.
2. Air circulation (the workhorse): Stagnant air holds moisture unevenly and breeds fungal spores. A single small oscillating fan, set on low and positioned 3-5 feet away angled across foliage (not blasting it), recreates the constant air movement orchids evolved in. This one step alone reduces fungal infections dramatically. Compare airflow options with our ventilation and fan comparison to size fans correctly for your space. Test your airflow: if a strand of hair moves gently, you're in the zone. If it whips or hangs limp, adjust.
3. Ventilation (passive and active): On warm days, open vents to let humid air escape. On cool mornings, close them to preserve overnight humidity. In bathrooms or kitchens, run exhaust fans intermittently, not continuously, to swap humid, stale air for drier, oxygen-rich air, but never place orchids directly in exhaust paths.
Avoid desiccating mistakes: Don't place orchids near HVAC vents, space heaters, or dehumidifiers. These create microclimates that crack pseudobulbs and desiccate aerial roots. Literally move them a shelf over if you have to.
Research shows that combining humidity sensors with misting systems reduces fungal infections by up to 40%. But you don't need a sensor at first - just consistent observation. If leaves turn yellow or wrinkled, humidity is too low. If spots appear and smell musty, airflow is insufficient.
What about light control without shading systems?
Light is the hardest variable to control without retrofitting, but low-tech options exist:
Strategic siting: Place high-light Vandas on your brightest (southeast) shelf. Reserve north-facing benches for low-light types like Paphiopedilums. This uses passive light gradients already present in your greenhouse.
Shading cloth (seasonal): On south and west walls, hang lightweight shade cloth (30-50% density) from May through September to reduce direct afternoon sun and heat buildup. East and shaded south-facing windows are ideal for Phalaenopsis; west windows work only with sheer curtains; north windows suit only low-light types.
Height and shelving: Upper shelves catch more light. Lower shelves stay dimmer. This vertical gradient is free zoning. Use it deliberately.
Most orchids need 12-14 hours of indirect light daily, though some sources cite 6-10 hours as sufficient. The key is indirect - not harsh midday sun, which burns foliage and spikes temperature. For shade-loving plants (including some orchids), see how to build diffused-light greenhouse setups that prevent leaf scorch.
Building Your Low-Tech Zone Plan
Step 1: Map Your Baseline
Spend one week with a thermometer and hygrometer at five points. Log temperature and humidity at dawn, midday, and dusk. You now own your climate data - no guessing.
Step 2: Identify Natural Zones
Match your data to the three zone templates above. For a deeper walkthrough on running distinct greenhouse temperature zones in one structure, this guide will help you fine-tune transitions. Most greenhouses naturally support at least two zones (cool/dim and warm/bright) and an intermediate middle.
Step 3: Stock by Zone, Not by Preference
Resist the urge to cram every orchid type into one corner because it looks nice. A Vanda suffocating in cool, humid, low-light conditions doesn't bloom - it survives miserably. Place it in the hot, bright zone. Let Paphiopedilums live in dim, cool corners. Biology doesn't compromise.
Step 4: Test Airflow
Place a small oscillating fan in a central, unobtrusive location. Ensure every plant experiences gentle, not violent, air movement. Adjust height or distance until foliage sways naturally.
Step 5: Monitor and Adjust
After two weeks, check leaf color. Medium green and upright signals correct placement. Yellow or deep burgundy means light or temperature is wrong. Soft, mushy roots mean humidity is too high or airflow too weak. Adjust by moving the plant, not the environment. Your zones are fixed; the plants are mobile.
The Reality Check: Why This Matters
Orchid greenhouse microclimates aren't trendy or Instagram-friendly. They're a risk-management framework. You're acknowledging that different orchids evolved in different habitats, and pretending they all want 70°F is magical thinking, not horticulture.
After a coastal storm years ago, I walked a field of twisted hoops with token anchors and flat roofs that trapped moisture. Most failed. The ones we rebuilt with deep bracing and proper drainage survived 60-knot gusts years later. The principle holds here too: build once with clarity and redundancy. Don't chase perfection - chase resilience. Overbuild once, sleep well always.
Your greenhouse should feel like a place where orchids thrive with minimal fussing, not a daily triage unit. That happens when zones match biology, airflow is consistent, humidity supports each type, and you've mapped the structure before stocking it.
Your Next Step
This week: take thermometer and hygrometer readings at five points in your greenhouse over three days. Record the data in a simple spreadsheet - time, location, temperature, humidity. By day three, patterns will jump out. You'll see where it's coolest, where it's brightest, where air stagnates. That data is your zone blueprint.
Next, identify which orchids you're actually growing (or want to grow) and match them to the zones your greenhouse naturally creates. Stop fighting physics. Use it. The margin between thriving and failing is measured in a few degrees and percentage points - and you now own the real numbers to get it right.
Related Articles