Your Mushroom Greenhouse: Year-Round Setup
By Hana Al-Khalil • 28th Apr
Growing mushrooms in a mushroom cultivation greenhouse transforms a backyard into a productive, low-maintenance food engine, unlike growing tomatoes or peppers, fungi thrive when you give them what they actually want: shade, moisture, and steady cool air. The beauty of this crop? Once your greenhouse environment is right, year-round mushroom production is genuinely achievable, even through winters when your neighbors' gardens sleep.
I learned this the hard way. When I inherited a sweltering hoop house, I spent months fighting heat spikes, watching crops wilt by noon. But mushrooms taught me something different. That same structure, shaded and ventilated thoughtfully, became a cool haven where oyster varieties thrived through seasons my neighbors thought impossible. My elderly neighbor started visiting at midday to help prune.
That's when I realized: comfort grows plants, and keeps you tending through storms. Let me walk you through how to build that same confidence into your own setup.
Understanding Mushroom Biology: The Two Environments
Before you place a single shelf, know this: mushrooms don't care about direct sunlight. They're unlike garden vegetables: they need two distinct environments, and your greenhouse must deliver both seamlessly. For a complete walkthrough of darkness, humidity, and airflow requirements, see our mushroom cultivation greenhouse guide.
The Incubation Phase (Spawn Run) happens in near-total darkness, where mycelium (the root network) colonizes your substrate. Think of this as the "growing roots" stage. It needs steady temperature, minimal airflow, and complete confidence that contamination won't creep in. This phase typically happens before fruiting blocks enter your greenhouse.
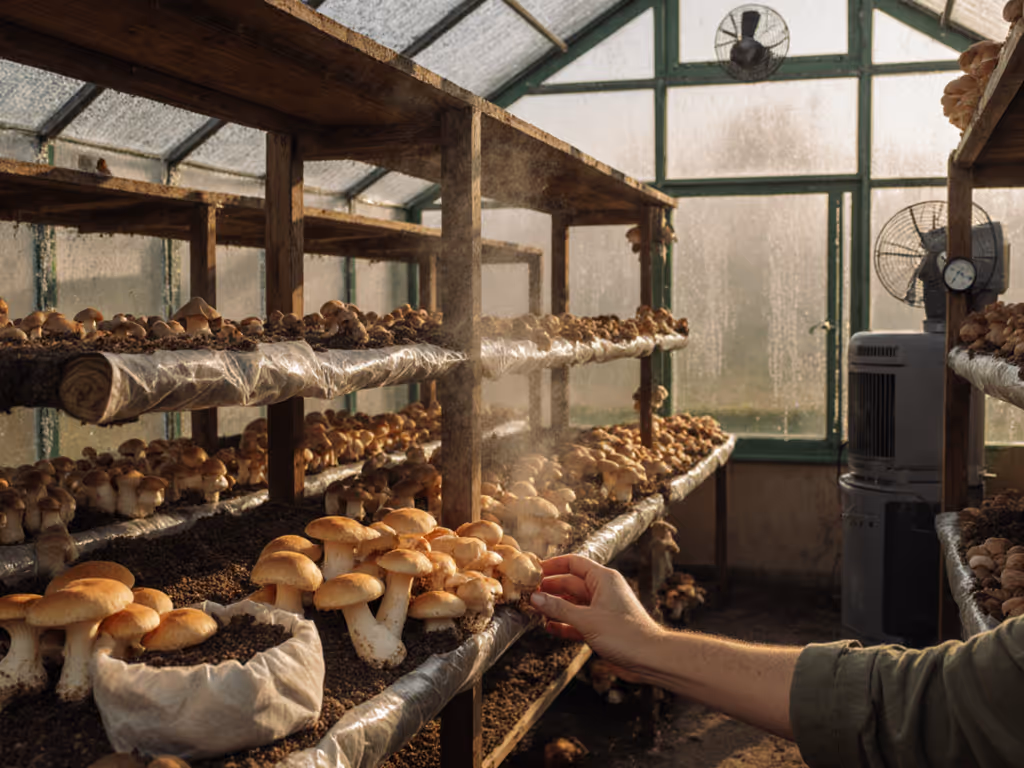
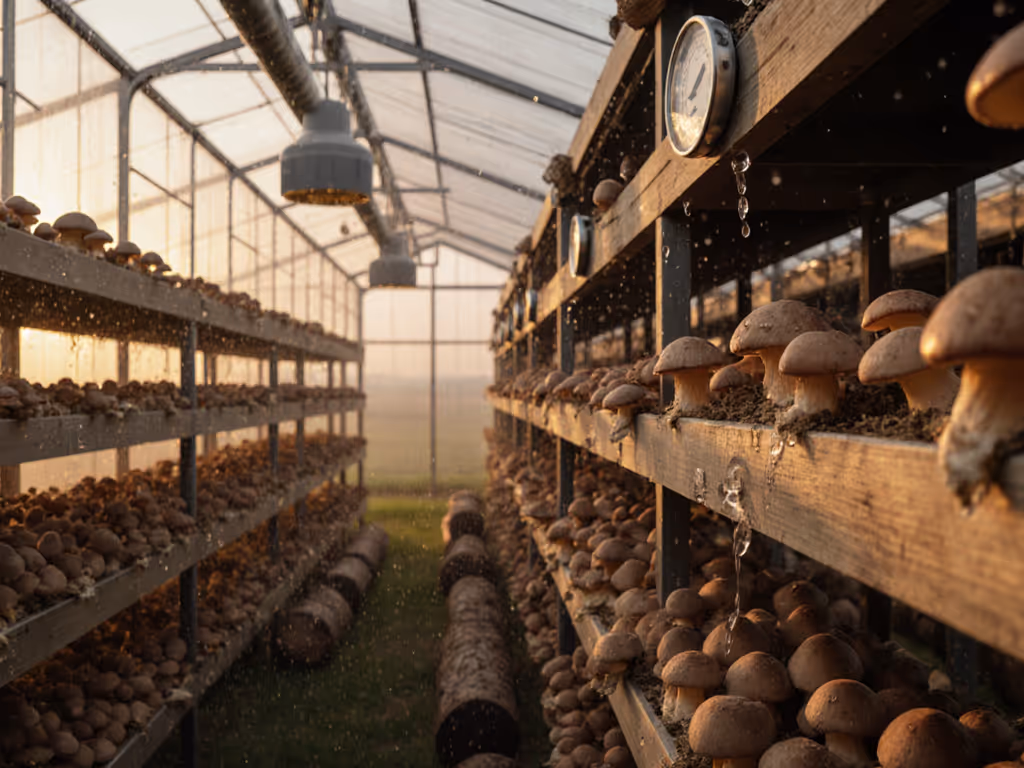
The Fruiting Phase is what transforms your greenhouse into a living, productive space. Blocks move under your staging (that shaded zone where nothing else grows). They need fresh air, high humidity (80-95%), indirect light, and a temperature drop that signals to the fungi: "Time to make mushrooms." This temperature shift, combined with fresh airflow, is what triggers fruiting. It's elegant: no heating bills, no fancy gadgets. Just physics and biology working together.
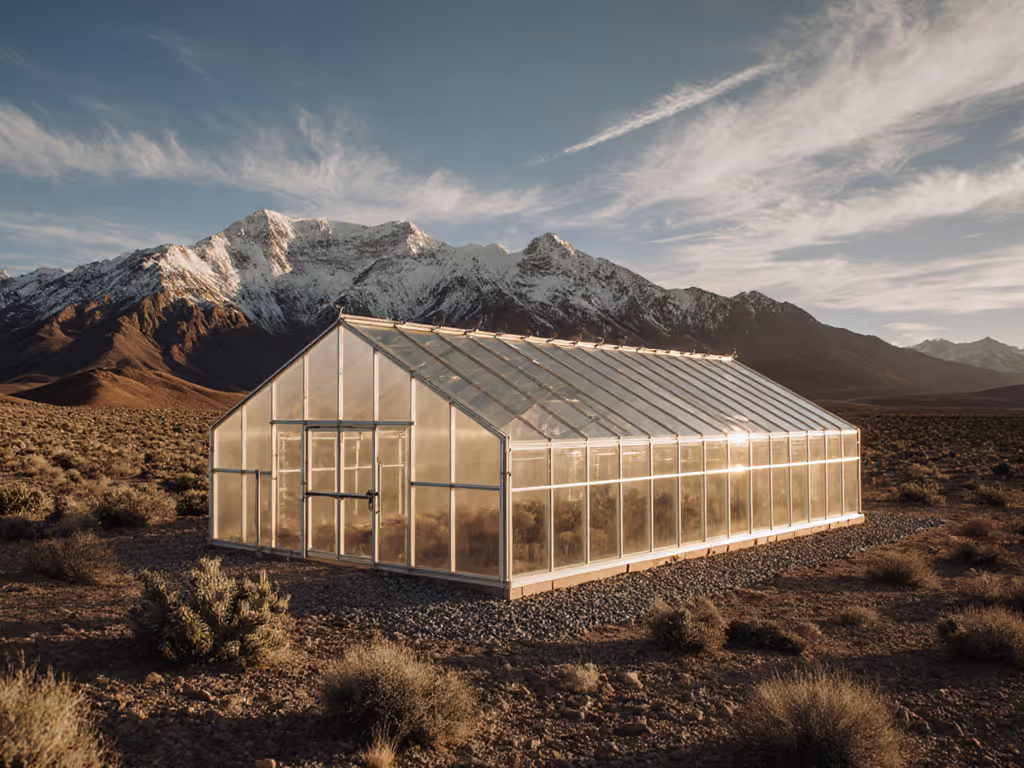
Step 1: Choose Your Greenhouse Location and Orientation
Design the path you'll actually use. This is the first decision, and it's not about aesthetics, it's about accessibility and airflow.
Place your greenhouse where you naturally move through your yard. If it's hidden behind a barn or down a muddy slope, you won't visit daily. Daily misting and monitoring is what separates thriving crops from disappointment.
Forested areas, north-facing walls, or spots that catch only morning light are ideal. Direct afternoon sun, especially in warmer months, will spike temperatures and dry out your blocks faster than you can mist. If your yard is open, natural shade cloth or plantings to the south soften the light without creating still, humid pockets where disease thrives.
Orient the entrance to face away from prevailing winds. Fresh air is essential; wind tunnels that bypass your blocks are not.
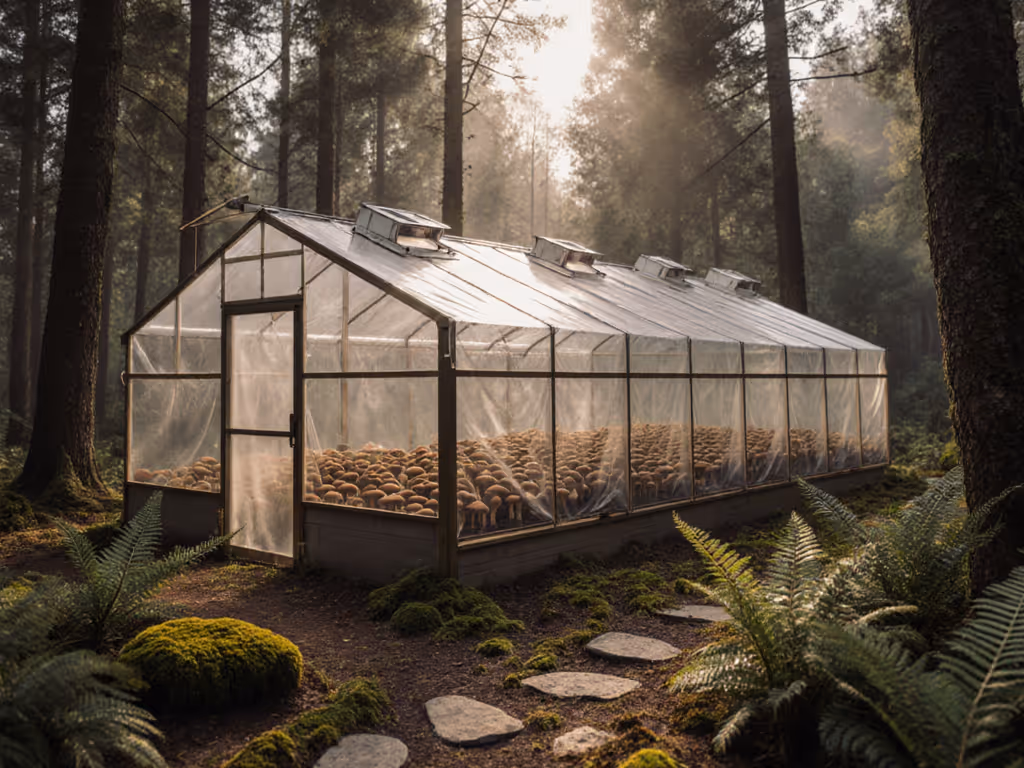
Step 2: Select Glazing and Shading for a Dark Environment Greenhouse
A dark environment greenhouse isn't about blackout curtains in summer, it's about intelligent layering from the start.
Consider double-layer polycarbonate or white poly greenhouse sheeting. White diffuses light, preventing the harsh rays that dry blocks and stress fungi. If you're building a tunnel structure (curved frame with polycarbonate or shade cloth), you'll save money and gain flexibility: you can roll up sides for summer cooling and close them tight in winter.
Add shade cloth (30-50% opacity) during peak sun months. Pair it with exhaust fans or roof vents positioned high (hot air rises, and it needs a clear escape route). The goal is gentle, indirect light during fruiting and complete darkness during spawn colonization in your incubation area (typically a separate shelf or corner).
Many growers position blocks under their greenhouse staging or benches. This creates a naturally shaded microclimate where mushrooms pop predictably, and the upper benches can hold seedlings or other shade-tolerant starts.
Step 3: Establish Temperature and Humidity Control
Mushrooms grow best between 55°F and 70°F. This is the sweet spot where most culinary varieties (oysters, shiitake, lion's mane) thrive. A greenhouse naturally buffers temperature swings, it's warmer in winter than outside, cooler in summer than full sun, but you need to dial it in.
In cold months, this means minimal heating. A few water barrels positioned along the north wall act as passive thermal mass (they absorb daytime warmth and release it slowly at night), steadying temperature. I've seen ten-degree drops from this alone. For passive heating without electricity, explore our thermal mass solutions for small greenhouses.
For humidity, misting 2-3 times daily by hand or via a simple timer-driven sprayer keeps blocks at that crucial 80-95% range. The greenhouse envelope does most of the work (it traps moisture), but stagnant air breeds mold. That's why ventilation (roof vents, exhaust fans, or simply opening doors at staggered times) is non-negotiable. Airflow moves CO2 out and fresh oxygen in, preventing the still, contaminated zones where unwanted fungi colonize your blocks.
Step 4: Design Your Growing Layout and Container Strategy
Vertical space is your friend. Shelves, stackable trays, and hanging grow bags let you maximize production per square foot while keeping everything visible and accessible. For tighter footprints, use these small greenhouse space strategies to stack production efficiently without choking airflow.
Arrange shelves so that:
- Upper tiers receive gentle indirect light and air circulation (good for fruiting blocks)
- Lower tiers, especially under staging, stay shaded (ideal for spawn colonization)
- Aisles remain clear, you'll be misting, rotating blocks, and harvesting
Choose containers wisely. Reusable buckets, jars, or shelving with trays beat single-use grow bags for longevity and waste reduction. If space is tight, hanging bags from greenhouse frame beams free up bench room and improve airflow around each block.
Label everything with dates. Spawn batches colonize on different schedules, and knowing which blocks are ready to fruit prevents the bottleneck of having too many or too few ready at once.
Step 5: Prepare for Year-Round Production Cycles
Controlled environment mushroom growing means you're no longer locked to seasonal harvests. Plan three or four staggered batches so that while one cohort is colonizing, another is fruiting, and a third is being harvested.
Winter is genuinely productive for many varieties. Oysters, wine caps, and shiitake prefer cooler temperatures, so your heating costs drop while yield holds steady. This is where a mushroom greenhouse truly shines; your neighbors' gardens are dormant, and you're picking fresh mushrooms three times a week.
Spring through fall, manage heat carefully. If temperatures approach 75°F, increase ventilation and shade cloth. A few hours of thermal stress isn't fatal, but sustained heat stops fruiting and dries blocks.
Step 6: Implement Ventilation and Air Quality
Fresh airflow is the difference between a humid, productive space and a petri dish for contamination.
Install:
- Roof vents or louvers (hot, humid air exits high)
- Intake vents lower on the opposite wall (cool, fresh air enters low)
- An exhaust fan on a timer, running morning and evening (strengthens that exchange)
- Coffee filters or fine mesh over intake vents (blocks spores and insects)
Open greenhouse doors at staggered times (early morning and late afternoon) to pulse fresh air through without shocking temperature. This rhythmic exchange mimics forest conditions where mushrooms naturally fruit.
If your greenhouse feels clammy or smells stale, airflow is your fix, not dehumidifiers. Dehumidifiers fight the mushroom's nature; airflow aligns with it.
Step 7: Monitor, Adjust, and Build Habits
Mycology greenhouse setup isn't a 'set it and forget it' endeavor, but the maintenance rhythm is gentler than vegetable gardening. Daily tasks:
- Mist blocks 2-3 times
- Scan for off-color patches (early contamination warning)
- Note temperature and humidity (a basic combo meter costs $20)
Weekly:
- Rotate blocks to ensure even light and air exposure
- Harvest ready mushrooms (don't wait, they release spores)
- Inspect staging and shelves for debris or pooling water
The beauty of a well-designed space is that these tasks become ritual, not chore. If your layout is logical, your path is clear, and your humidity is stable, you'll actually enjoy the space. You'll find yourself lingering, noticing, tending.
Moving Forward: Build, Adjust, and Share
Your greenhouse doesn't need to be perfect on day one. Start with the fundamentals: shade, ventilation, and steady moisture. Add layers (automatic misters, sensors, shade cloth swaps) as you learn your microclimate.
Keep notes. Track which batches colonized fastest, which varieties fruited heaviest in each season, and what temperature swings coincided with contamination. Over a year, patterns emerge. By year two, you'll be predicting yields and planning batches with confidence.
Invite someone to help: a neighbor, a friend, a family member. Mushroom houses become gathering spaces. There's something almost meditative about misting blocks on a cool morning, and others will feel it too.
Explore mushroom substrate management deeper: experiment with spent coffee grounds, straw blends, or hardwood sawdust. Join online cultivation communities, watch build videos from growers in climates like yours, and ask questions. The mycology community is generous with knowledge.
Your greenhouse is no longer just a vegetable growing space. It's a year-round food engine, a cool refuge, and proof that when you design a space around what plants actually need, not what you assume they need, comfort and productivity follow. That's the path worth building.
Related Articles