Greenhouse to Garden: Stress-Free Seedling Hardening Off
By Hana Al-Khalil • 4th Jan
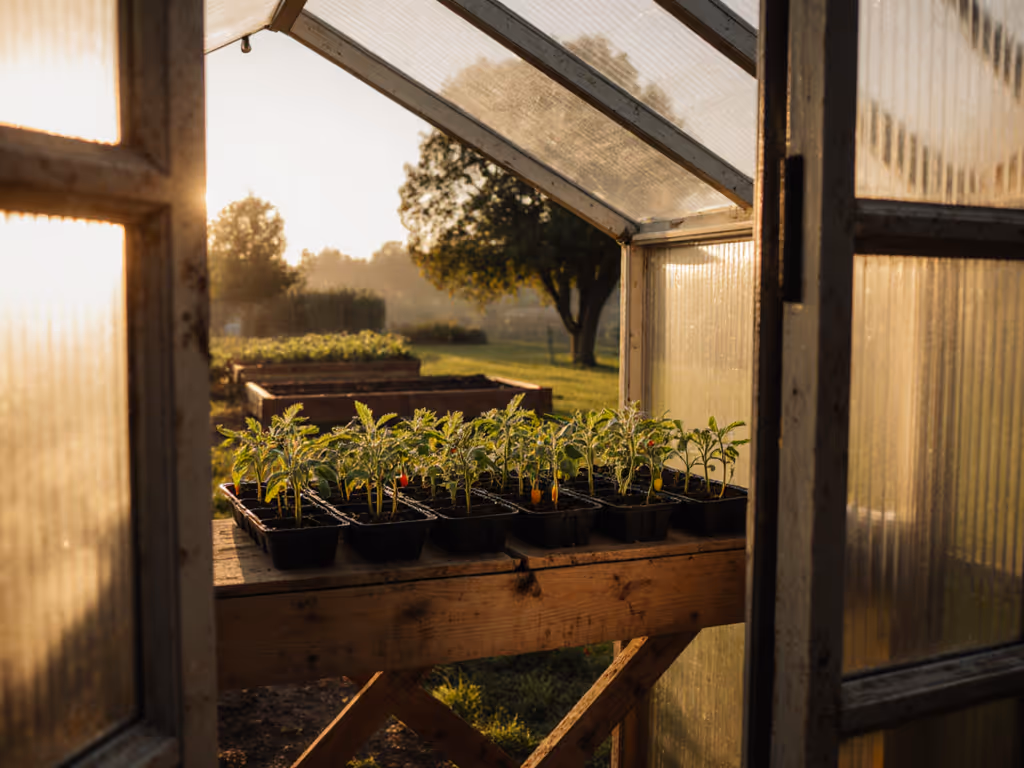
There's a quiet magic in watching seedlings you nurtured from mere specks transform into garden-ready plants, yet skipping proper greenhouse hardening off can unravel weeks of care in just hours. That seedling transition from controlled environment to open garden isn't just a step; it's the bridge between hope and harvest. I've seen too many gardeners lose promising plants to sunscald or wind damage because they rushed this delicate phase. But with the right approach, you can turn anxiety into anticipation. Remember: comfort grows plants, and keeps you tending through storms.
Why Your Seedlings Need This Gentle Handoff
Hardening off isn't coddling, it's biological preparation. When plants grow in the sheltered environment of a greenhouse garden, their cell walls stay thin, leaves stretch for light, and roots grow accustomed to stable temperatures. Suddenly thrust outdoors, they face three stressors: UV intensity that can burn tender foliage within hours, wind that dehydrates faster than roots can replenish, and temperature swings that trigger shock. I learned this firsthand when my first hoop house produced leggy tomatoes that wilted under midday sun. Only after observing how light filtered through different coverings did I realize my seedlings needed graduated exposure (not just protection). To choose light that forgives seedlings while they adapt, consider semi-diffused greenhouse covers that balance seed-starting clarity with summer-friendly diffusion.
The science is clear: during proper hardening, plants accumulate carbohydrates, thicken cell walls, and redirect energy toward root development. This isn't just theory; you'll see the change. Run your fingers over hardened leaves (they feel sturdier, less waxy). Measure soil moisture before and after wind exposure; established roots absorb water more efficiently. These sensory cues signal readiness for the garden.
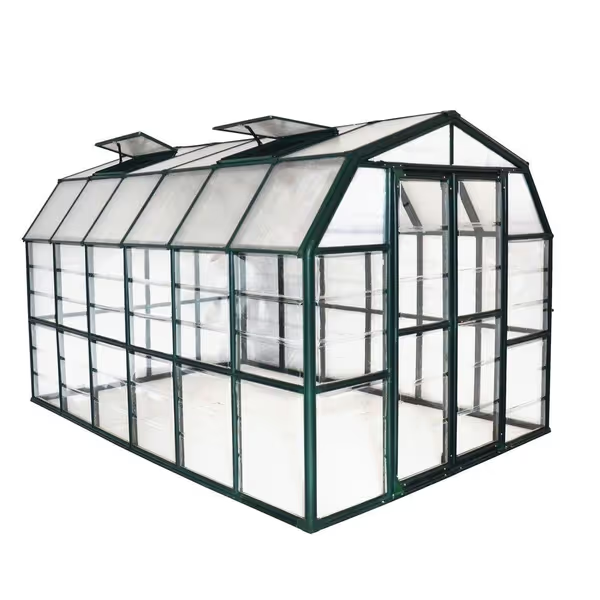
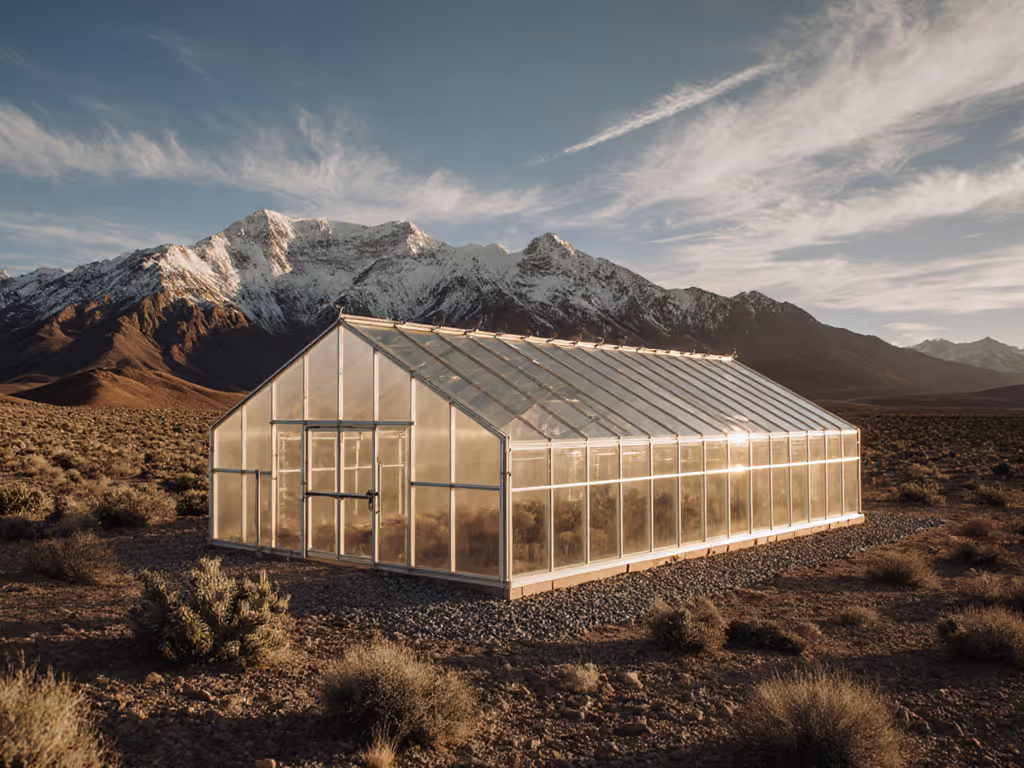
Palram - Canopia Rion Grand Gardener 2
Spacious barn-style greenhouse with UV-protected polycarbonate for extended gardening.
$2454.75
Glazing4mm Twin-Wall Polycarbonate UV Protected
Glazing4mm Twin-Wall Polycarbonate UV Protected
Pros
High headroom and large gardening space (8'x12')
Durable, UV-protected twin-wall polycarbonate panels
Cons
Mixed durability feedback; not ideal for strong winds
Customers find the greenhouse looks great and appreciate its quality. However, the durability receives mixed feedback... Moreover, assembly experiences are mixed... and customers report issues with wind resistance, noting that it doesn't survive strong winds.
Customers find the greenhouse looks great and appreciate its quality. However, the durability receives mixed feedback... Moreover, assembly experiences are mixed... and customers report issues with wind resistance, noting that it doesn't survive strong winds.
Crafting Your Gradual Exposure Schedule: A Sensory Roadmap
Your gradual exposure schedule should mirror nature's own pacing, not a rigid timetable, but a responsive dance with your microclimate. Here's how to tune in:
-
Start with sheltered observation (Days 1-3): On mild mornings (ideally 55-65°F/13-18°C), place seedlings under a porch roof or dense tree canopy for 2-3 hours. Focus on temperature acclimation before sun exposure, notice how leaves stop drooping within 30 minutes as they adjust to breezes.
-
Introduce filtered light (Days 4-6): Move plants to dappled shade (like under a deciduous tree) for 4-5 hours. This mimics the diffused light conditions of quality greenhouse coverings. If using a structure like the Palram Grand Gardener 2 with its twin-wall polycarbonate panels, you'll find its soft light helps ease this phase.
-
Full morning sun (Days 7-9): Expose plants to direct sun before 11 AM. Watch for subtle cues: slight leaf curling means one hour less exposure tomorrow; perky upright growth means add one hour.
-
Overnight test (Day 10): Leave plants out overnight if lows stay above 45°F (7°C). Check for firm stems at dawn (any softness means another sheltered night).
Comfort is a yield multiplier. When your hardening process feels manageable, not stressful, you'll catch subtle signs of plant readiness others miss.
Reading Your Plants' Language
Successfully acclimating plants outdoors hinges on becoming fluent in plant body language. Here's what to observe during each phase:
-
Leaf texture: Soft, almost translucent leaves indicate vulnerability. Hardened leaves feel leathery and spring back when gently bent.
-
Color shifts: Pale green suggests sun stress; deeper emerald means adaptation. Avoid bronze or purple tints, they signal cold shock.
-
Growth patterns: Temporary growth pause during hardening is normal. If stems elongate rapidly, plants are still stretching for light, so extend sheltered time.
-
Dew retention: Healthy hardened seedlings dry faster in morning sun. Lingering moisture after 9 AM hints at poor air circulation.
For urban growers with limited space, consider a "mobile hardening station" (a wheeled cart with shade cloth that lets you roll seedlings from balcony to sheltered nook). Balcony growers can also evaluate railing-mounted mini greenhouse kits to create protected, movable staging areas for hardening off. This hack respects accessibility needs while maximizing microclimate control.
Troubleshooting the Transition
Even careful gardeners face setbacks. If seedlings wilt despite proper watering:
- Sunscald rescue: Immediately move to full shade for 24 hours, then restart with 50% reduced exposure time.
- Wind damage fix: Create a temporary windbreak with lattice or burlap (never plastic, which traps heat).
- Cold snap response: Cover plants with frost cloth before temperatures drop, not after symptoms appear. To buffer nighttime dips without electricity, our guide to zero-electricity small greenhouse heating shows simple thermal mass setups that stabilize temps during hardening off.
Remember that mature plants from nurseries need less hardening than home-started seedlings (they've already experienced some environmental shifts). But never skip the process entirely; even greenhouse-grown perennials benefit from 3-4 days of adjustment.
Your Invitation to Confident Gardening
The true measure of successful plant hardening techniques isn't just survival, it's how vibrantly plants thrive afterward. When your transitioned seedlings establish quickly, withstand weather surprises, and outproduce store-bought transplants, you'll understand why this process matters. More importantly, you'll feel the quiet satisfaction of working with nature's rhythms rather than fighting them.
I still think of that elderly neighbor who began joining me in my cooled greenhouse to prune tomatoes (a testament to how thoughtful design transforms spaces from chores into sanctuaries). When you enjoy the process, you tend through every season. Ready to deepen your understanding? Explore our companion guide on microclimate mapping for greenhouse gardens, where compass angles and afternoon shadows become your most reliable planting partners. For latitude-specific orientation and sun-path tips, see our winter greenhouse sun path guide.
Related Articles