Rainwater Harvesting Greenhouse Systems: Side-by-Side Comparison
By Takumi Sato • 27th Mar
Why Rainwater Harvesting Greenhouse Comparison Matters for Your Growing Goals
If you're building or upgrading a greenhouse, the question isn't whether to capture water - it's how to do it without turning water capture into a regret. A rainwater harvesting greenhouse comparison frames the real trade-offs: system cost, storage durability, delivery reliability, and climate fit. The right integrated water collection system reduces your reliance on municipal supplies, cuts utility bills, and sustains your crops through dry spells. The wrong one becomes a costly anchor dragging on your operation.
This guide walks you through the major frameworks (roof vs. ground catchment, gravity-fed vs. pump-powered delivery, tank types, and sizing), using real-world data and a bias toward designs that simply don't fail when the season demands them.
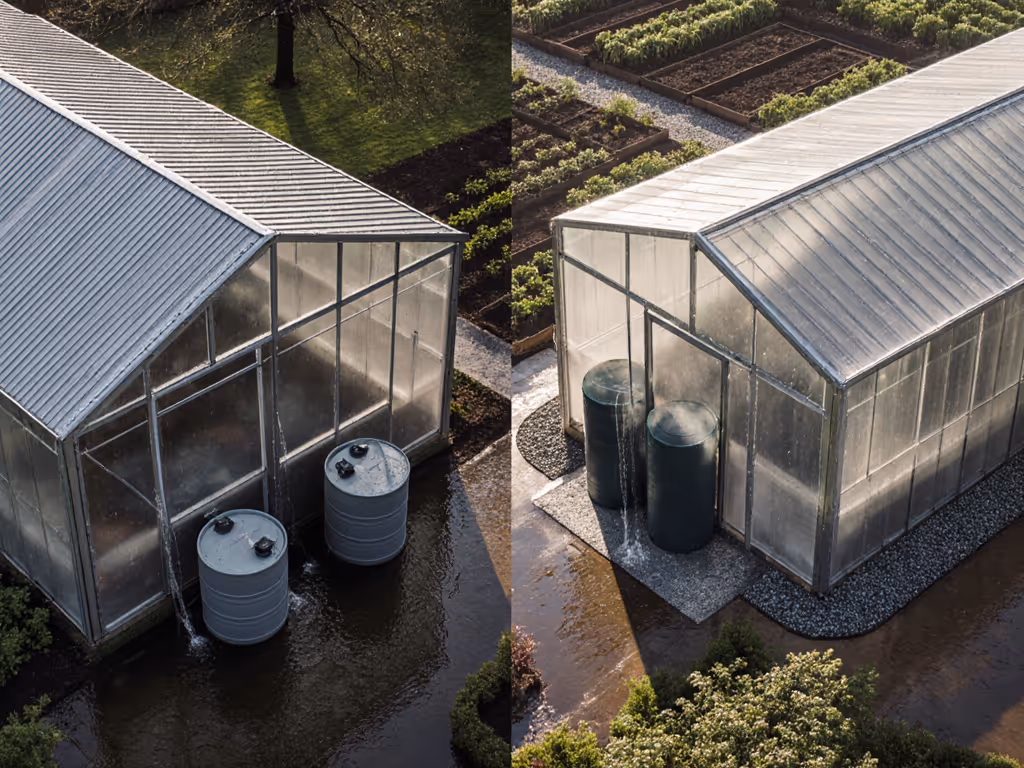
System Comparison: Catchment Methods for Greenhouses
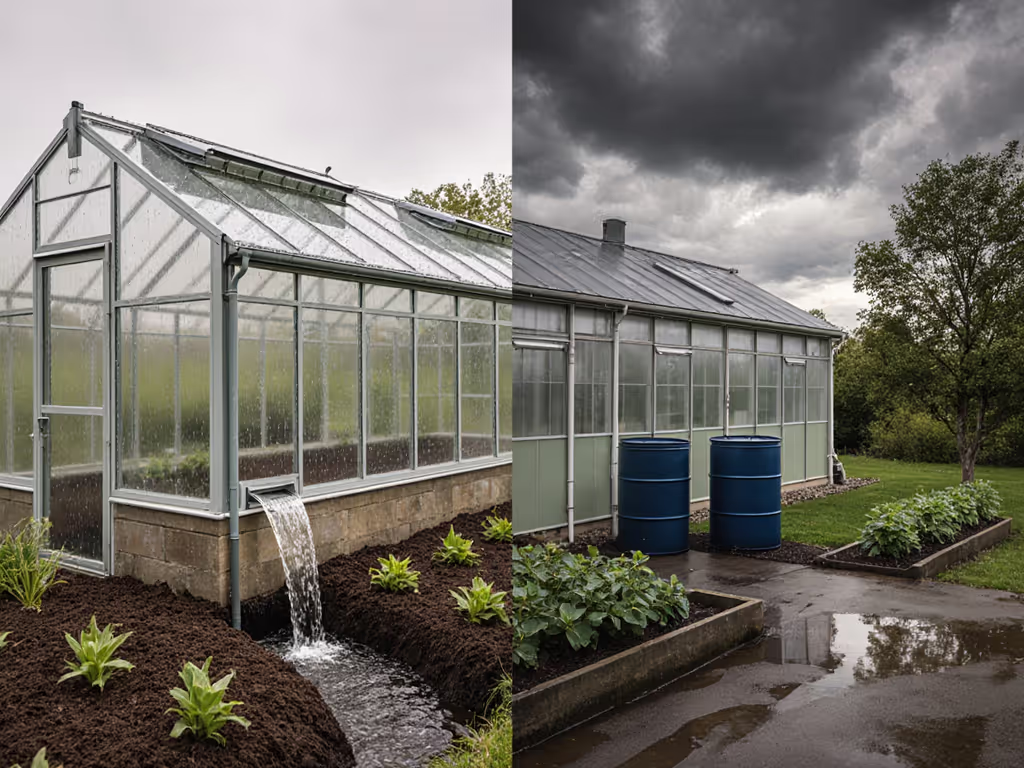
Gutter-Connected Greenhouses: Maximum Collection with Minimal Retrofit
Gutter-connected structures offer the highest catchment-to-footprint ratio. Your greenhouse roof becomes a water-harvesting machine: connect downspouts directly to piping and storage, and you're done. The surface area is already framed and sealed. No additional infrastructure clutters the landscape.
Advantages:
- Largest collection surface relative to installation cost
- Simple gravity feed into adjacent tank
- Works with existing roof pitch and eave design
- Minimal site disruption
Disadvantages:
- Entire system depends on correct gutter slope and downspout sizing
- Debris (leaves, pollen) concentrates in gutters; cleaning is mandatory
- Tank location is constrained by gravity logic
Real-world water delivery: During spring growing seasons, gutter-connected greenhouses have met 75-100% of total irrigation water requirements using harvested rainwater paired with drip delivery.
Hoophouses and High Tunnels: Adapted Collection for Curved Structures
Hoophouses and high tunnels don't come pre-equipped with gutters. You must add one: either at the base of the hoophouse sidewall or via a hip board tucked under the roll-up sides. For step-by-step retrofits like adding hip-board gutters without compromising structure, see our greenhouse kit customization guide. This is more involved than a gutter retrofit on a rigid greenhouse, but it's proven and cost-effective.
Advantages:
- Captures rain that would otherwise run off the perimeter
- Hip board designs (such as those from Rimol Greenhouse Systems) integrate gutter function without compromising ventilation
- Works with both hoop and tunnel frame types
- Can direct flow to gravity-fed storage downslope
Disadvantages:
- Requires accurate gutter positioning and pitch during assembly
- Hoophouse fabric movement under wind can stress gutter connections
- Damage to sidewall fabric can disable the gutter system
Sizing reality: A typical hoophouse with a 30-foot width and 100-foot length offers roughly 1,500-2,000 square feet of effective catchment; in a region averaging 30 inches of annual rainfall, that yields approximately 28,000-37,000 gallons per year - a meaningful offset to purchased water.
Modular and Underground Systems: Aesthetics and Space Efficiency
For homeowners who want water captured without visible infrastructure, modular systems (such as the Aquascape Rainwater Harvesting System) integrate storage underground or within water features. Water is collected via roof downspouts, routed to filtration, and stored in subsurface cisterns.
Advantages:
- Water feature doubles as storage; no eyesore tank
- Filtration is pre-engineered and compact
- Flexible placement, can sit under permeable pavement
- Professional aesthetic integration
Disadvantages:
- Significantly higher upfront cost ($5,000+ for 2,500-gallon capacity)
- Underground cisterns require site excavation and proper drainage assessment
- Repair or tank replacement involves digging and system shutdown
- Overkill for modest backyard growing; better suited to larger estates or commercial properties
Water Delivery: Gravity-Fed vs. Pump-Powered Systems
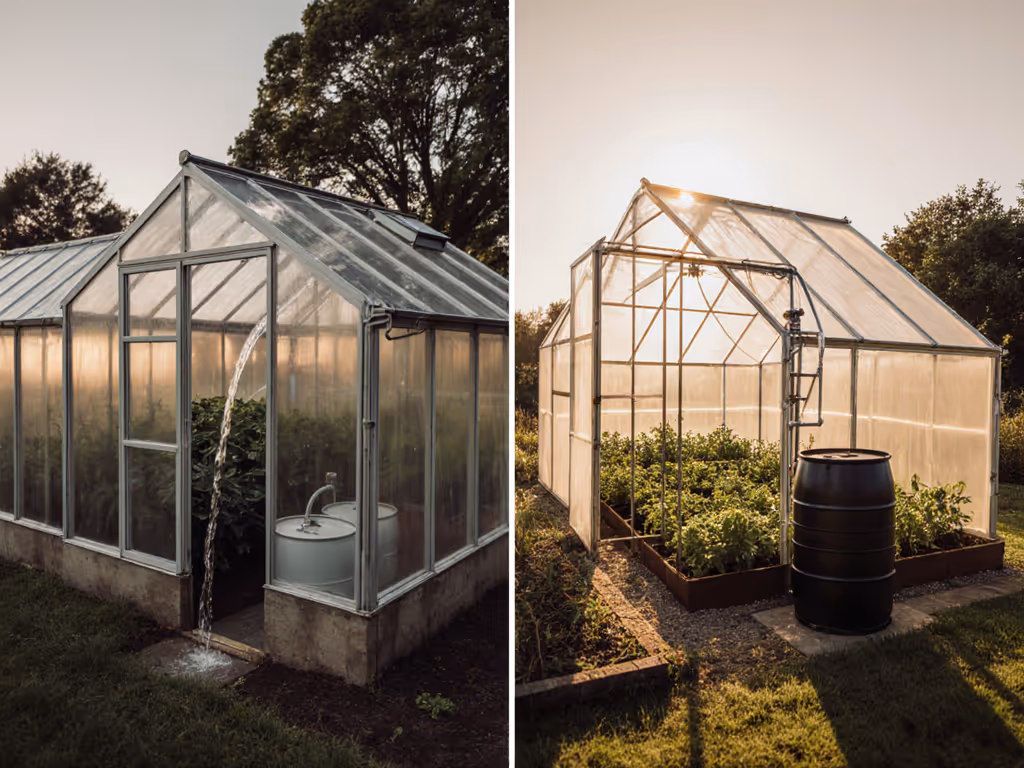
Gravity-Fed: Simplicity and Resilience
If your storage tank sits higher than your growing beds - on a slope, on a platform, or in a partially buried setup - gravity does the work for you.
When gravity works:
- Tank elevated 4-8 feet above bed level provides usable pressure (roughly 2-4 PSI per foot of elevation)
- Drip irrigation operates without a pump; very low energy cost
- No moving parts; no pump failure risk during peak season
- Ideal for small to mid-scale operations (500-2,000 gallons)
Real-world caveat: Pressure is modest. Drip lines work perfectly; overhead sprinklers sputter. Plan for slow, steady delivery, not instant saturation.
Pump-Fed: Flexibility and Redundancy
When ground slopes downward or your tank is small and low, a pump lifts water to pressure. Smaller solar-powered pumps or low-horsepower electric models suit greenhouse irrigation.
When to pump:
- Tank sits below growing beds
- You want to inject water into a main line serving multiple zones
- Winter heating or seasonal demand spikes call for fast delivery
- You're building a redundant system (pump backup, automated float switches)
Sizing logic: Account for elevation gain, line length, irrigation type (sprinkler vs. drip), and power source availability. A solar panel (200-400W) can drive a 0.5-1.5 HP pump continuously in spring/summer; in winter, it's undersized, so supplemental grid power or a battery may be needed.
Cost reality: Pump systems add $800-$2,000 depending on power source and tank volume; gravity-fed systems cost $300-$800 for tank, plumbing, and simple controls.
Water Efficiency: Matching Delivery to Crop Needs
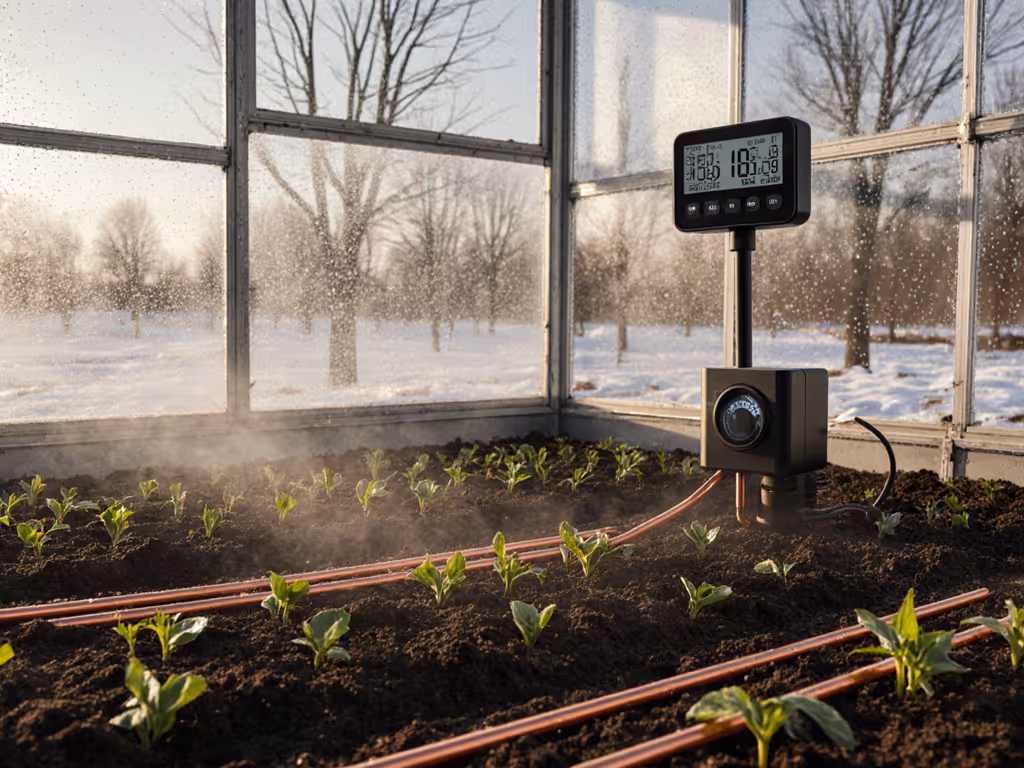
Drip and Subsurface Drip: The Efficiency Gold Standard
Once water is delivered, how it reaches the plant root zone determines waste. Drip irrigation achieves 90-95% water efficiency compared to 60-70% for conventional sprinklers. Subsurface drip systems push efficiency to 95-98%, eliminating evaporation and reducing fungal disease pressure.
For greenhouse vegetables and herbs:
- Sweet pepper crops sustained on harvested rainwater require approximately 60% of total water needs when using drip delivery
- Leafy greens (lettuce, spinach, kale) are even more water-miserly; drip systems can meet 90-100% of needs during cool seasons
The implication: a modest rainwater capture system (1,000-1,500 gallons) paired with drip irrigation can sustain a serious kitchen garden or small market operation year-round in temperate climates.
Overhead and Flood-and-Drain: Trade-Offs
Overhead sprinklers and ebb-and-flow benches are easier to set up but waste water and create humidity problems. In humid climates with poor ventilation, overhead systems invite powdery mildew and botrytis. Not sure what airflow you need? Our greenhouse fan comparison quantifies CFM and heat reduction across kits. In dry climates, they evaporate 25-40% of applied water before it reaches soil.
Use case: Overhead works for hardening-off seedlings and applying foliar nutrients; don't rely on it for primary irrigation if water is scarce or cost is a concern.
Sizing Your Tank: From Gutters to Storage
The Calculation
Catchment area (roof or gutter, in square feet) × annual rainfall (in inches) ÷ 12 = annual water yield (gallons).
Example: A 1,500-sq-ft gutter surface in a region with 40 inches of annual rainfall yields roughly 5,000 gallons per year.
Divide annual yield by 365 days and by your daily irrigation demand to see the safety margin. If your drip system uses 50 gallons per day during peak growing season and you capture 15 gallons daily on average (accounting for dry spells), you're relying 67% on rainwater capture and 33% on backup - a prudent mix.
Tank Material and Placement: Where Resilience Matters
This is where Takumi's principle takes hold: strong enough is not enough. A plastic rain barrel is cheaper and easier to move, but a properly anchored, oversized cistern outlasts three bargain-basement kits.
Material options:
- Food-grade plastic (IBC totes, 275-400 gallon): Affordable ($100-$300), portable, UV-degradable over 5-7 years. Good for renters or trial setups.
- Reinforced fiberglass or polyethylene (500-2,500 gallon): Durable (15-20 years), resistant to UV and freeze-thaw, better thermal mass. Cost: $800-$2,500.
- Concrete or underground cisterns (1,000+ gallons): Extreme durability, minimal temperature swing (better for year-round operations), labor-intensive install. Cost: $3,000-$8,000.
Anchoring non-negotiable: A 2,500-gallon cistern weighs 10,000+ pounds when full. Anchor it with concrete footings, not stakes. Add overflow and drain plugs at the base - not the side - to prevent spill during heavy rain or equipment failure. Install a screen or first-flush diverter to exclude debris from the first few gallons of each storm (they carry roof dust and contaminants). This is not complexity for its own sake; it's the difference between reliable water and a breeding ground for algae and mosquitoes.
System Comparison at a Glance
| System Type | Catchment Surface | Typical Cost (Tank + Plumbing) | Best For | Key Weakness |
|---|---|---|---|---|
| Gutter-connected greenhouse | 2,000-4,000 sq ft | $1,500-$4,000 | Medium to large operations; existing structures | Gutter maintenance; debris; gravity-dependent |
| Hoophouse/high tunnel retrofit | 1,200-2,000 sq ft | $1,000-$2,500 | Retrofits; smaller farms | Gutter durability under wind; assembly skill |
| Modular underground (Aquascape style) | 1,500-3,000 sq ft (roof source) | $5,000-$12,000 | Aesthetic integration; affluent homeowners | High upfront cost; repair complexity |
| Gravity-fed storage + drip | Any of above | $300-$800 (low power) | Small residential; passive approach | Limited pressure; slow delivery; elevation constraint |
| Pump-fed storage + automation | Any of above | $2,000-$5,000 (with solar/electric) | Commercial; multi-zone; redundancy | Power dependency; pump failure risk; maintenance |
Common Questions: Putting Comparison into Practice
Q: How much does a complete rainwater harvesting greenhouse setup cost?
A: Small systems (rain barrels + drip kit for a 100-sq-ft hoop house): $400-$1,200. Mid-scale (cistern + gravity-fed lines, 1,500-gal): $1,500-$3,500. Commercial or modular integrated: $5,000-$15,000. The data shows ROI breaks even in 3-7 years if you're currently paying $50-$100+ per month for municipal water or well-pump energy.
Q: Will harvested rainwater need filtration or treatment?
A: For drip irrigation and foliar spray, yes, at minimum a 100-200-micron screen filter or first-flush diverter to block sediment and roof debris. If you're hand-watering or topdressing, basic straining suffices. For potable human use, treatment is mandatory (reverse osmosis, UV, activated carbon), which adds $1,000-$3,000 and ongoing maintenance.
Q: How do I choose between gravity and pump delivery?
A: If your tank can be elevated 4+ feet above your growing beds with minimal site work, gravity wins - zero operating cost, maximum reliability. If your site slopes away or your beds are uphill, pump. Budget for solar power (300-500W panel, $400-$800) if grid electricity is unavailable or pricey.
Q: What happens in a drought or exceptionally dry year?
A: Oversizing tank capacity by 20-30% above your peak-season demand is cheap insurance. A 2,500-gallon tank costs $200-$400 more than a 2,000-gallon one but bridges a 15-20% shortfall during dry spells. Overbuild once; sleep through the wind warnings at night. Pair rainwater with a backup, municipal water on a timer, a well, or neighbor-shared supply, so one dry season doesn't kill your season. For climate-specific design in dry regions, use our arid climate greenhouse guide to cut water demand further.
Q: Can I use rainwater for all my crops, or only some?
A: Drip-fed leafy greens thrive almost entirely on harvested rainwater in temperate zones (90-100% during cool seasons). Heat-loving crops (peppers, tomatoes) demand slightly more consistent moisture, so they benefit from 60-70% rainwater + supplemental drip or occasional hand water during peak summer. Heavy feeders (tomatoes, squash) may benefit from periodic well-water or compost tea to maintain nutrient cycling.
Actionable Next Steps: Building Your System
1. Audit your catchment and demand.
- Measure your greenhouse or gutter surface area
- Research your region's average annual and seasonal rainfall
- Calculate your daily irrigation need (gallons per day during peak season)
- Compare: Is rainwater capture a 50-70% solution, or will you stay heavily reliant on backup?
2. Map your site for tank placement and gravity logic.
- Walk your property with a level or smartphone level app
- Identify a spot 4+ feet higher than growing beds if gravity-fed is an option
- Note slope direction, soil stability, and winter drainage patterns
- Confirm no utilities (electrical, gas, water mains) underlie planned cistern location
3. Choose your catchment and delivery method.
- Gutter-connected: lowest complexity, highest yield
- Hoophouse retrofit: moderate retrofit; verify frame compatibility
- Underground modular: luxury option; confirm site drainage and excavation access
- Gravity-fed: simplest delivery if elevation allows; plan for slow but steady flow
- Pump-fed: necessary if slope is unfavorable; budget for solar or grid power, plus ongoing maintenance
4. Select tank material and size conservatively.
- For 1-3 year trial: food-grade plastic IBC (275-400 gal), $100-$300
- For permanent install: polyethylene or fiberglass cistern (1,000-2,500 gal), oversized by 20-30% above peak demand
- Anchor with concrete footings; install first-flush diverter and debris screen
- Bury overflow and drain plugs; use a backflow preventer if backup water sources are on the same line
5. Pair water capture with precision delivery.
- Drip irrigation: 90-95% efficiency; pairs perfectly with harvested water
- Subsurface drip: 95-98% efficiency; eliminates foliar disease risk
- Avoid overhead sprinklers for primary irrigation; reserve for seedling hardening
6. Plan for seasonal redundancy.
- Don't bet your entire operation on one water source
- Maintain a backup supply (municipal on a timer, neighbor's well, rain-fed pond)
- Install a float switch on your main tank to trigger backup delivery if harvest falls short
Strong enough is not enough. Overbuild your tank anchoring, gutter slopes, and filter redundancy once - not efficiently, but durably. The cost premium is negligible compared to a year of crop loss or system failure mid-season. After you've lived through one season of reliable water flow and thriving greens, you'll understand why resilience is the cheapest insurance you'll ever buy.
The Bottom Line
Rainwater harvesting transforms a greenhouse from a water-dependent structure into a sustainable greenhouse water system that cuts costs, reduces environmental footprint, and builds food security. The right integrated water collection system depends on your catchment area, site slope, crop mix, and climate, but all paths converge on the same principle: size conservatively, anchor robustly, and pair capture with drip delivery. Start with an audit, build in redundancy, and you'll harvest three seasons of reliable greens before your neighbors even complete their first structure.
Related Articles