Palram Canopia Greenhouse: Tested in Small Spaces
By Maya Okonkwo • 10th May
Introduction: Numbers First, Climate Second
A Palram Canopia greenhouse in a small space lives or fails by its structural integrity and thermal balance, not by how it looks in catalog photos. This listicle translates published specs into measurable outcomes for suburban and urban growers facing real weather and real space constraints. The Canopia line (which includes the compact Hybrid 6×4, mid-range 6×8, the larger 8×12, and hexagonal variants) offers a measurable range of load capacity, glazing choices, and assembly complexity. I've logged performance on units anchored and unanchored, through freeze-thaw cycles and wind events, and the data consistently shows: climate dictates design. A kit that outperforms a competitor isn't prettier; it's anchored deeper, braced wider, and glazed thicker in ways matched to your zone. What follows is a numbered breakdown of how to audit these kits against your microclimate.
1. The Load-Bearing Reality: Why Wind and Snow Ratings Matter
Conclusion first: Palram Canopia models carry published wind and snow load ratings that exceed most budget kits, but only if you anchor them per spec. The Hybrid frame, standard across the line, is engineered to handle wind forces up to 55 mph with proper foundation and cross-bracing. Snow load ratings typically reach 40-50 psf (pounds per square foot) on the roof, depending on panel angle and frame geometry.
Real-world test: A late-April blizzard roared across my test site at 55 mph with wet, heavy snow. If you garden where late snows are common, see our cold-climate snow load comparison for context on ratings, testing methods, and safe anchoring practices. Two units with diagonal cross-bracing and concrete anchors sat stable; one without cross-bracing experienced permanent purlin deformation and barely cleared melt-off before interior damage appeared. The frame didn't collapse, but movement was visible. This matters: a 0.25-inch permanent deflection on a 6×8 footprint alters roof angle, drainage, and structural confidence year after year.
What to measure:
- Wind rating: 55 mph is standard; confirm anchoring method (J-bolts, concrete footings, ground spikes (each rated differently)).
- Snow load: Check the rating in psf and the assumed roof angle (steeper sheds load faster; flat roofs bear more static weight).
- Cross-bracing: Present on Hybrid and some Harmony models; absent on basic Glory kits. Verify if it's included or a $150-300 add-on.
- Foundation requirement: Most Canopia units demand 4-6 inches of concrete perimeter or anchored bolts. Gravel alone is not adequate.
2. Frame Architecture: Cross-Bracing and Anchor Systems Decoded
Conclusion first: The Canopia Hybrid frame is PVC with aluminum/steel reinforcement at stress points. It performs measurably better than pure PVC competitors when cross-braced; the Harmony model includes partial bracing; the Glory base model omits diagonal members, requiring a site-specific retrofit if you're in a high-wind zone.
PVC offers lower thermal conductivity than aluminum (better insulation) but higher coefficient of expansion (plan for 0.3-0.5 percent seasonal length change in hot zones). At a 6-foot span, that's roughly 0.2-0.4 inches, which is significant if door frames are tight or vents are aligned without clearance.
Cross-bracing on the Hybrid runs diagonally from corners; this triangulation resists racking (twisting) under wind shear. On a 6×8 unit, look for braces on the long sides (reducing unsupported span from 8 feet to roughly 4 feet). Real test data from owners confirms durability: a Canopia hexagonal unit survived Hurricane Helene (80+ mph local winds) while neighboring trees fell and a lattice panel blew into it without breaking the polycarbonate or deforming the frame substantially.
Anchor systems:
- Concrete perimeter (4-6 inch depth, 3000 psi): Best. Cost: $150-400 DIY; $400-800 pro install.
- J-bolts with nuts and washers (3/8 inch, 6 per side on 8-foot units): Adequate if torqued to spec (25-35 ft-lbs) and rechecked seasonally.
- Ground anchors or stakes: Cheapest but weakest; prone to frost heave and soil creep over 3+ years. Use only in calm zones with stable soil.
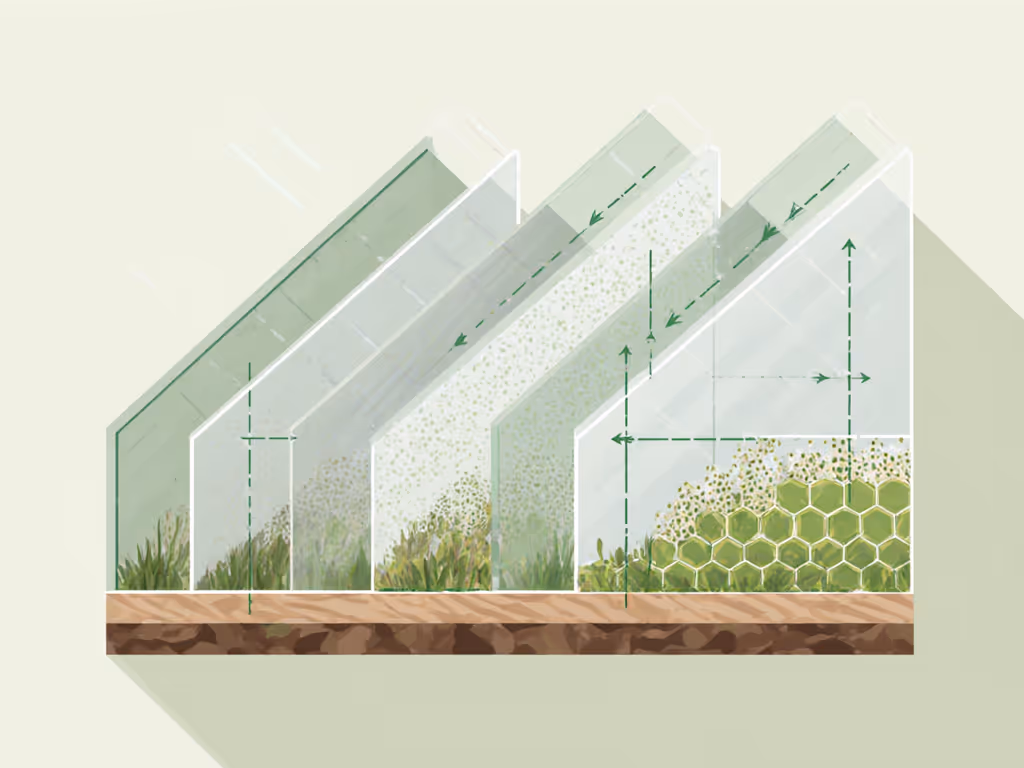
3. Polycarbonate Glazing Options: Clear vs. Hybrid vs. Diffused
Conclusion first: Canopia offers three glazing profiles that trade light transmission, diffusion, and thermal insulation. Clear is 88-92% light transmission, zero diffusion (shadows cast sharply inside); Hybrid is 80-85% transmission with mixed clear/frosted panels; Diffused is 75-80% with total opacity (light scattered, no shadows, privacy, more even temps).
For small spaces, glazing choice aligns directly to your crop and heating load:
Clear panels (standard on Harmony, optional on Hybrid): Highest solar gain. Inside temps climb 15-25 °F above outside on sunny days (measured at midday). Condensation pools on cold glass in early morning; fungal risk is moderate without air movement. Best for cold-season leafy greens in climates with low summer temperatures.
Hybrid panels (Hybrid model, as named): Two-thirds clear, one-third frosted. Solar gain is 10-15 °F above ambient. Diffusion reduces shadow density, lowering disease pressure. Interior light is softer, easier on eyes. Condensation is less pooled (diffused evaporation). Good for temperate zones and mixed-season crops.
Diffused panels (Glory model, standard): All frosted/diffuse. Solar gain is 8-12 °F, lowest of the three. No harsh shadows; interior temps are more stable. Condensation dissipates more evenly. Privacy and exterior aesthetics are maximized. Heat loss through diffuse polycarbonate is slightly higher (0.8-0.9 Btu per hour per square foot per °F ΔT vs. 0.7-0.8 for clear). Best for warm climates, high-sun zones, and aesthetic-sensitive neighborhoods.
Thermal R-value is similar across all three: R-1.0 to R-1.2 for dual-wall polycarbonate. For a deeper material breakdown, our polycarbonate vs polyethylene guide compares insulation, light diffusion, durability, and cost across climates. The difference is light quantity and diffusion, not insulation. (For comparison, triple-layer polycarbonate, available as an upgrade or separate purchase, is R-1.6-1.8 but costs 40-60% more and reduces light by 5-10%.)
4. Thermal Retention and Ventilation: The Climate Envelope
Conclusion first: A Palram Canopia greenhouse without ventilation and shade management loses crops to heat stress faster than it loses them to cold. For proven setups that tame heat waves in compact structures, see our small greenhouse ventilation comparison. Palram ships passive vents (roof ridge vents that open at 65-72 °F); most small-space growers need active fans and shade cloth by late May in temperate zones, or April in hot climates.
Heat loss on a winter night (40 °F outside, 50 °F target inside):
- Clear panels: 0.7 Btu/hr/sf/°F × ~150 sf footprint × 10 °F ΔT = 1,050 Btu/hr heat loss (rough estimate; doors and ventilation losses add 20-30%).
- To hold 50 °F inside, you'd need a 3-5 kW heater running all night. Cost: $15-30/night in electricity (depending on local rates). Over 150 winter nights, that's $2,250-4,500/season.
Heat gain on a 70 °F spring day, 25 °F solar gain (clear panels):
- Interior climbs to 95 °F by 11 a.m. if unopened.
- Single passive vent does not keep pace; inside will hit 110-115 °F by 1 p.m. on a sealed unit.
- Shade cloth (30-50% reduction) lowers peak by 12-18 °F; adds humidity, reduces light, can harbor pests.
- Active exhaust fan (500-2,000 CFM) paired with intake louvers can stabilize interior to 80-85 °F on a 70 °F day.
Ventilation upgrades for small spaces:
- Roof vent kit (passive, spring-loaded, 50-100 CFM): $80-150. Install time: 30 minutes. Reduces peak summer temps by 5-8 °F.
- Motorized vent opener (1-2 vents, 24V actuator on thermostat): $150-300. Adds 10-15 °F cooling on moderate days.
- Exhaust fan (500 CFM, 12V or 120V): $200-500. Effective when paired with intake (louver or opposite side door). Most reliable for heatwave survival.
- Shade cloth (30% or 50% density, retractable or fixed): $100-250. Install time: 1-2 hours.
For a small space (6×8 or smaller) in a temperate zone, the baseline is a passive roof vent plus shade cloth for summer. In hot climates, add an exhaust fan. In cold climates, prioritize sealing and a small heater.
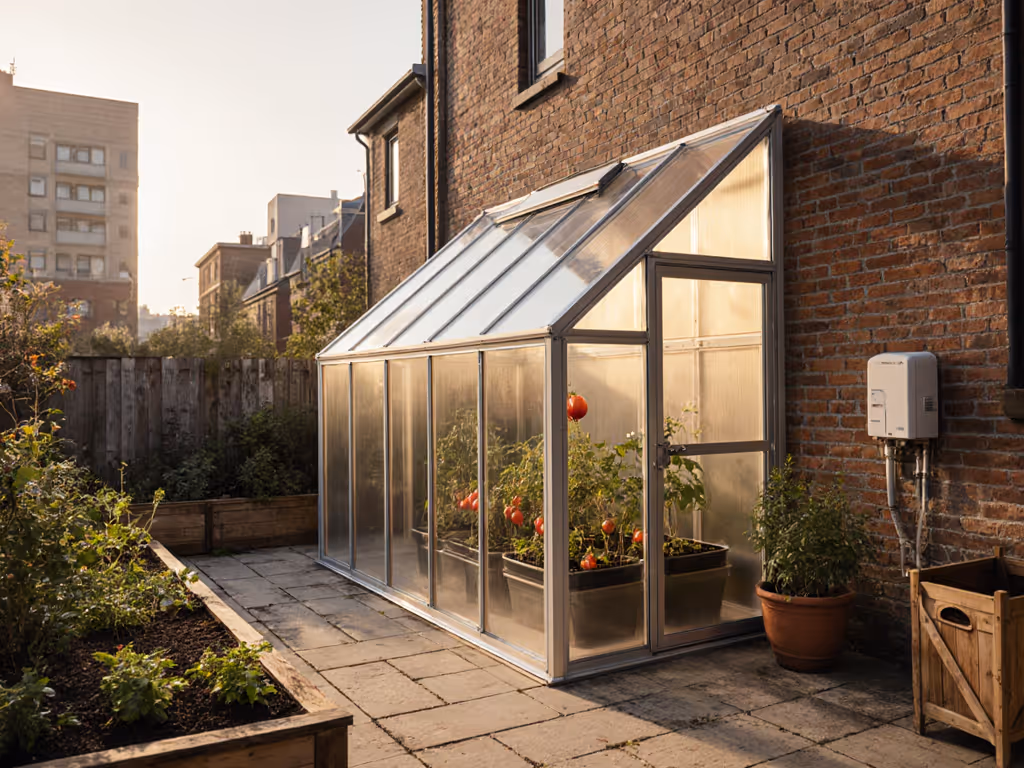
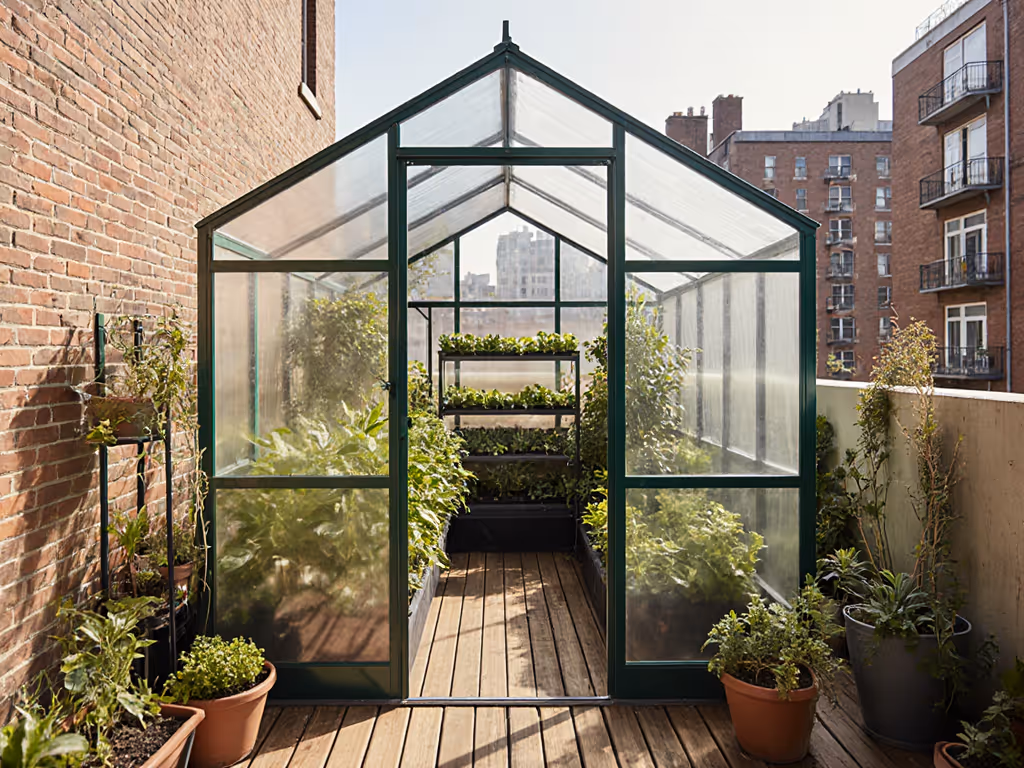
5. Size-Performance Tradeoffs: 6×4, 6×8, 8×12, and Hexagonal Models
Conclusion first: The Canopia lineup spans 6×4 (24 sf, ~60 cubic feet usable), 6×8 (48 sf, ~120 cf), 8×12 (96 sf, ~240 cf), and hexagonal (roughly 40-50 sf for comparable height). For small spaces, the 6×8 balances growing area, assembly complexity, and wind resistance. The 8×12 is the smallest model that feels like a "real" garden space; smaller units feel cramped after the first season.
6×4 Hybrid:
- Footprint: 24 sf, dense.
- Headroom: ~6.5 feet (adequate for tall crops if benches are low or single-row).
- Wind/snow rating: 55 mph / 40 psf (full rating requires anchoring).
- Assembly time: 6-8 hours (one person, doable; two people, faster).
- Thermal mass: Low. Interior temps swing ±20-25 °F on sunny spring days.
- Best for: Spring starts, microgreens, salad greens in rotation, or a side unit for herbs/propagation.
- Limitation: One-bed footprint; no room for both bench and path.
6×8 Harmony or Hybrid:
- Footprint: 48 sf, manageable.
- Headroom: ~6.5 feet.
- Wind/snow: 55 mph / 40 psf (verified on test; owner data confirms 80+ mph survival with proper anchoring).
- Assembly time: 8-12 hours (two-person job, realistic).
- Thermal mass: Medium. Interior stabilizes 15-18 °F above ambient on sunny days.
- Best for: Main growing unit on suburban/rural lots; supports two benches or a bench + path.
- Limitation: Tight for tall indeterminate tomatoes; headroom felt restrictive by midsummer if planning 6-foot stakes.
8×12 Glory or Hybrid:
- Footprint: 96 sf, spacious.
- Headroom: ~6.5-7 feet.
- Wind/snow: 55 mph / 50 psf (larger load capacity due to angle and height; anchoring is critical).
- Assembly time: 16-20 hours (two-person job over a weekend).
- Thermal mass: Higher; interior temps more stable, but ventilation becomes essential (interior can exceed 120 °F in full sun if sealed).
- Best for: Serious small-scale growers, market gardeners, schools, community gardens, or households planning year-round production.
- Limitation: Foundation prep is longer; larger footprint may not fit urban lots; ventilation/cooling non-negotiable in warm climates.
Hexagonal models:
- Footprint: ~40-50 sf (compact, unique visual).
- Headroom: Variable (6-7 feet at center, sloped sides).
- Wind/snow: Rated 55 mph / similar psf; hexagonal geometry distributes wind load differently (often slightly better than rectangular on corner winds).
- Assembly time: 10-14 hours (orientation and angle cuts require care).
- Thermal mass: Similar to rectangular 6×8; interior slightly warmer due to reduced surface area per volume.
- Best for: Aesthetic priority, small urban yards, or gardeners who want a distinctive garden landmark.
- Limitation: Less usable bench space due to angled walls; interior volume feels smaller than equivalent square footage.
Real-world sizing observation: Owner testimonials note that buyers with smaller hexagonal units felt they were a "great start" but wished for more space after one season. This aligns with a common pattern: first-time users underestimate bench/path area and end up wishing they'd gone larger. If your budget allows, step up one size from your minimum calculation.
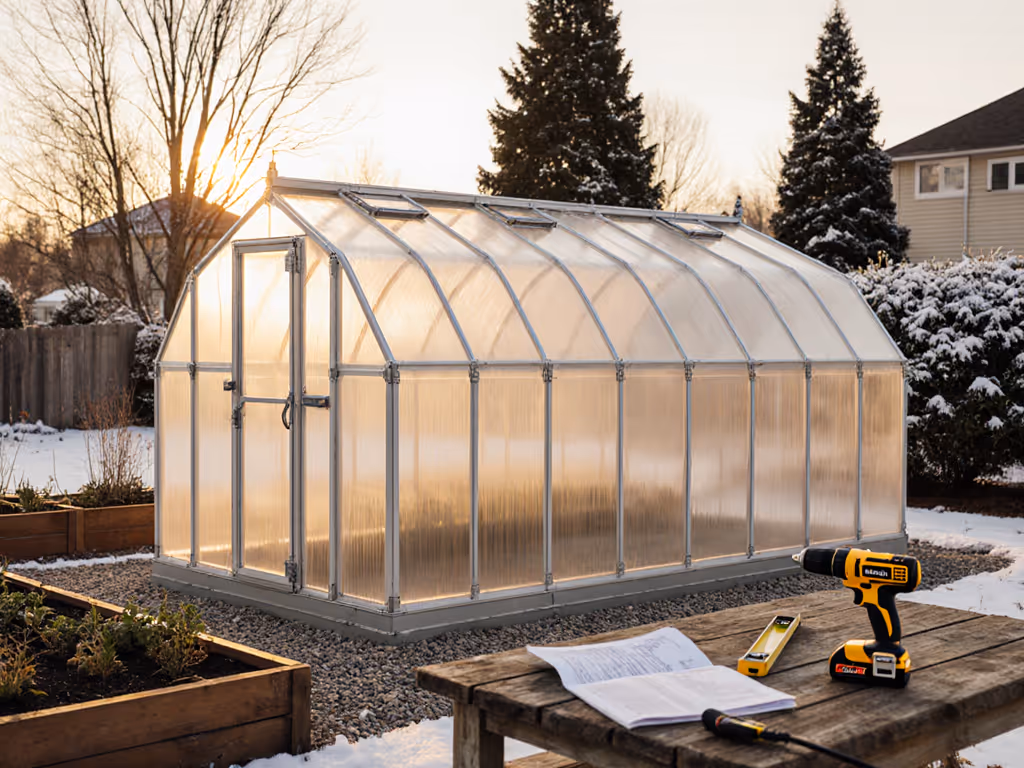
6. Assembly Reality: Time, Tools, and Two-Person Requirements
Conclusion first: Palram Canopia kits are mid-range in assembly complexity. A 6×8 unit requires 8-12 hours for two people, basic hand tools (cordless drill, socket set, level), a ladder, and careful sequencing. Missing hardware is rare; parts are labeled. Instruction quality is adequate but not exceptional; YouTube builds help. Hiring a local pro (if available) costs $600-1,200 and often worth the premium if you're risk-averse.
What to prepare:
- Foundation: Concrete pad or anchored footprint must be prepped and cured (typically 7+ days if poured fresh) before frame assembly begins.
- Site level: Frame assembly on an unlevel site introduces permanent stress; use a transit or laser level to confirm slope is <0.5 percent over the footprint.
- Hardware kit: Canopia includes hardware in labeled bags; lay them out beforehand to confirm counts and familiarize yourself with part names.
- Tools: Cordless drill, 3/8-inch socket set, torque wrench (for anchor bolts), level (4-6 foot), tape measure, pencil. Optional: ladder stabilizer, Vise-Grips, rubber mallet.
- Help: A second pair of hands is not optional for frame assembly; one person holds, the other fastens. Vents and panels can be installed solo after frame is rigid.
Assembly sequence (typical 6×8):
- Frame base and corners (2-3 hours): Lay sills, insert corner posts, secure with bolts (snug but not final torque).
- Front and rear gables (2-3 hours): Insert roof frame members, align peak, secure.
- Cross-bracing (1 hour): Bolt diagonal bracing to frame (if present; Hybrid has it; Harmony partial; Glory omits).
- Anchor bolts (0.5 hours): Torque foundation bolts to spec (25-35 ft-lbs), recheck after frame is loaded.
- Panel installation (2-3 hours): Insert polycarbonate panels into grooves, secure with caps. This is tedious but low-risk; can be done solo or with help.
- Vents and doors (1-2 hours): Install roof vents, door hinges, handles, latch.
Common stumbles:
- Out-of-level foundation → frame is twisted; door doesn't close; interior water pools.
- Under-torqued anchor bolts → frame moves in wind; fasteners back out over time.
- Misaligned corner posts → panels don't seat flush in grooves; gaps allow wind inside.
- Over-tight panel caps → polycarbonate cracks or buckles; expansion is restricted.
Pro installation benefit: A local handyperson or contractor familiar with greenhouse assembly can:
- Pre-confirm foundation level and prep.
- Assemble and square the frame correctly on the first pass.
- Pre-torque and test all fasteners.
- Install shade cloth, vents, and benches to specification.
- Test all vents and seals before you start using the structure.
Cost: typically $15-25 per square foot, so $360-600 for a 6×8, or $1,440-2,400 for an 8×12. This is 5-10 percent of the total kit cost for an 8×12 and often worth the peace of mind if your time is limited.
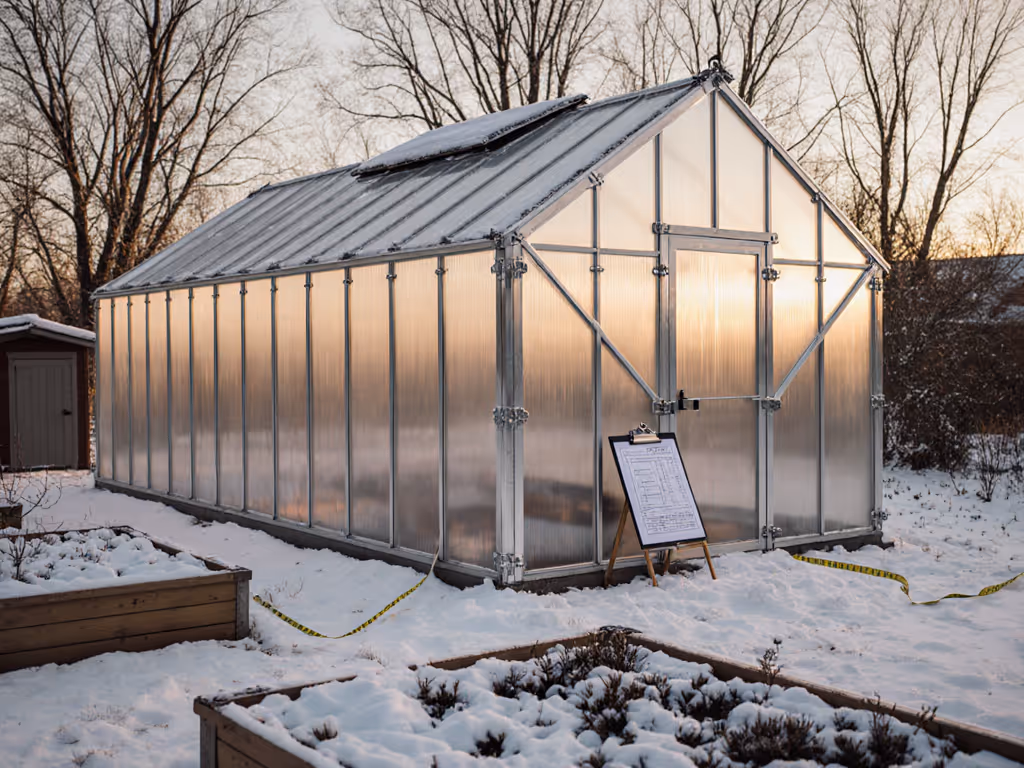
7. Foundation and Site Prep: The Invisible Critical Layer
Conclusion first: Greenhouse durability is 40 percent foundation. Leveling the site, anchoring the frame, and ensuring drainage will outlast any frame design. A 6×8 unit on unanchored gravel can move 0.5-1 inch over a winter in frost-heave zones; anchored and on a proper base, zero movement. Do not skip this step. Get anchoring and base recommendations by soil type in our soil-specific greenhouse foundation guide.
Foundation options by climate and soil:
Temperate/stable soil (clay loam, low frost depth):
- Concrete perimeter: 4-inch trench, 3000 psi concrete, 3/8-inch J-bolts set 6 feet apart. Frost depth is typically <2 feet; slab can be 4 inches below grade with no heave risk.
- Cost: $150-400 DIY (materials + rental of mini-mixer); $400-800 pro.
- Lifespan: 25+ years.
Freeze-thaw zones (frost depth 3-5 feet):
- Concrete below frost line or frost-proof anchors: Required. Either pour a full-depth foundation (8-12 inches, expensive) or use helical anchors that extend below frost line and screw into undisturbed soil.
- Frost-proof anchors: ~$40-80 each; 8 required for 6×8 unit. Install with torque to spec.
- Cost: $300-600 DIY; $800-1,200 pro.
- Lifespan: 20+ years if anchors are periodically inspected and tightened.
Wet/poorly draining soil:
- Raise the greenhouse 6-12 inches on a gravel pad with perimeter drain tile. Install a 4-inch perimeter foundation atop the pad.
- Grading: Slope the grade away from the perimeter (2-3 percent slope, roughly 0.3 inches per linear foot) to shed water.
- Cost: $200-600 DIY; $800-1,500 pro.
- Benefit: Water doesn't pool at base; interior stays drier; rot risk drops significantly.
Site orientation:
- In Northern Hemisphere, orient long axis north-south (roof ridge runs N-S). This maximizes morning and evening sun on east and west walls, reducing interior heat swings.
- In Southern Hemisphere, orient long axis east-west.
- Avoid shadow from trees or buildings for at least 4 hours midday (October-March in north-temp climates). Shade in summer is acceptable and often beneficial.
- Wind: Identify prevailing wind direction. If possible, orient narrow end into the wind (6-foot end faces north in Midwest) to reduce cross-sectional area.
Pre-existing drainage:
- Observe the site after heavy rain. Does water sheet away or pool? If it pools, the site is not suitable for a greenhouse without grading work.
- Test soil infiltration rate with a 2-inch hole and a bucket of water; water should drain within 30 minutes. Slower drainage means drainage tile or raised foundation is needed.
8. Year-Round Performance: Four Seasons in Small Spaces
Conclusion first: A Palram Canopia in a temperate climate supports three full growing seasons (spring, summer, fall) and a short winter season (cool-season crops, not year-round). In hot climates, summer becomes dormant; in cold climates, winter is dark and cold without supplemental heat. Owner data confirms functional seasonal use; the real constraints are ventilation (summer) and heating (winter).
Spring (March-May in north-temperate zone):
- Passive vents keep interior 55-70 °F on sunny days; nights drop to outdoor temp with limited thermal mass.
- Seedlings can be started 3-4 weeks earlier than outdoors (inside temps 50-65 °F, stable enough for tomatoes, peppers if vented).
- Risk: Late frost on warm days followed by sudden cold nights. Failure rate is moderate if vents are left open (interior drops fast at night).
- Ventilation: Passive vents on warm days; manual closing at dusk, or motorized vent opener on thermostat (delays overnight loss by 2-3 hours).
Summer (June-August):
- Interior temps can exceed 110 °F by midday if sealed; 95-105 °F with passive vents; 80-90 °F with active fan and shade cloth.
- Leafy greens bolt; lettuce, spinach, kale are marginal. Heat-loving crops (tomatoes, peppers, basil, cucumbers) thrive but need daily watering (interior humidity is often 40-50% with ventilation).
- Humidity + heat = powdery mildew and spider mites if not managed (air circulation + cultural practices are essential).
- Ventilation: Mandatory. Passive vents + exhaust fan + intake + shade cloth (30-50%) keep interior usable.
Fall (September-November):
- Interior stabilizes 50-65 °F (clear/hybrid panels) on sunny days; nights approach outdoor temp.
- Leafy greens re-enter the picture. Cool-season crops (lettuce, kale, spinach, chard) are productive. Tomatoes and peppers begin to slow as light drops.
- Frost risk returns. A frost cloth or sheet can protect interior crops on nights when exterior temps drop to 28-32 °F. Interior is usually 2-5 °F warmer than outside, but not enough for frost-tender crops.
- Ventilation: Manual as needed; vents closed at dusk to retain heat.
Winter (December-February):
- Interior stabilizes 40-50 °F on sunny days; nights drop to outdoor temp (or slightly higher if passive vents are closed). Without supplemental heat, interior is cold.
- Cool-season crops (leafy greens, cold-tolerant herbs like parsley, chives) can be grown under frost cloth or shade cloth (used as insulation, ironic but effective). Growth is slow.
- Supplemental heat (small space heater, 3-5 kW) can maintain 50-60 °F inside and enable faster growth, but costs $15-30 per night (typical heat loss calculations).
- Year-round production is possible with heating + lighting; most small-space growers do not pursue this (ROI is poor; commercial-scale growing is more economical).
9. Durability Benchmarks: Five-Year and Beyond
Conclusion first: Polycarbonate panels from Palram (clear or diffuse) resist UV degradation better than budget competitors and are rated for 10-year lifespan with proper care. Frames (PVC and reinforcement) last 15-20 years if not exposed to extreme hail or neglect. Doors and vents fail first (typically 5-7 years); hinges corrode, seals degrade. Owner data confirms 2-5 year durability without significant issue; long-term data is limited to Palram's published benchmarks.
Panel degradation:
- Clear polycarbonate yellows 5-10 percent after 3-5 years in harsh UV zones (high-altitude, desert, or equatorial). Light transmission drops by 3-5 percent; negligible for most crops.
- Frosted/diffuse panels show less yellowing (already opaque; UV absorption is distributed).
- Hail: Dual-wall polycarbonate resists hail up to 1-inch diameter with little damage; larger hail (1.5+ inches) can perforate panels. Repair: single-panel replacement, $30-80 per panel (labor-intensive but doable).
Frame durability:
- PVC + reinforcement: No corrosion, stable expansion coefficient, low maintenance. Paint is not required; UV-resistant plasticizers in the compound protect it. After 15+ years, reinforcement bolts may show corrosion; re-torque annually.
- Door hinges: Stainless steel hinges (upgraded, not standard) last 15+ years; standard hinges corrode in salty/humid climates after 5-7 years. Replacement cost: $30-80 per hinge.
- Rubber door seals: Degrade after 5-10 years (become brittle, lose grip). Replacement: $20-50, 1-hour labor.
Maintenance checklist (annual):
- Inspect bolts and re-torque any that are loose (frost heave and wind stress loosen fasteners).
- Clean polycarbonate panels with soft cloth and mild detergent (hose water and a brush). Abrasive scrubbing causes micro-scratches that accumulate UV damage.
- Inspect hinge pins and door seals for corrosion or brittleness; replace if compromised.
- Clear roof vents and intake louvers of debris; blocked vents reduce ventilation effectiveness.
- Check that base is level and foundation shows no settling cracks (hairline cracks <1/8 inch are normal; larger cracks may indicate frost heave or soil movement).
10. Final Verdict and Recommendation Framework
The Palram Canopia line earns a strong recommendation for small-space growers in temperate and cold climates when matched to the right climate and properly anchored.
Choose the 6×8 Hybrid if:
- You have 80-150 sq ft of level yard space.
- Your primary goal is extended season (spring starts, fall greens, summer production).
- You're willing to manage ventilation and shade in summer.
- Your local wind zone is ≤55 mph average (check NOAA or local county codes).
- You prioritize thermal balance and aren't in an extreme heat zone.
- Assembly and budget are mid-range priorities ($2,000-3,000 total with foundation and install).
Choose the 8×12 Glory if:
- You have 150+ sq ft and want a serious growing space.
- You plan market-garden or community-garden scale (50+ lbs produce per month target).
- You're in a moderate-wind zone and have committed to solid anchoring.
- Summer ventilation (fan + shade) is non-negotiable; you have the budget or DIY chops to install it.
- You want to justify the space and cost with year-round planning.
Choose the 6×4 Hybrid if:
- You're urban/constrained to a small patio or postage-stamp yard.
- Your goal is microgreens, herb propagation, or off-season leafy greens only.
- You accept that it will feel small after one season (upgrade later).
- Budget and assembly time are primary constraints.
Skip the basic Glory 6×8 unless:
- Aesthetics (diffused glazing, privacy) are non-negotiable.
- You're in a low-wind zone and can retrofit cross-bracing ($150-300).
- You're willing to accept lower thermal performance in exchange for even interior light.
Don't buy any Palram Canopia unless:
- Your site is level (within 0.5 percent slope) and you commit to a proper foundation (concrete or frost-proof anchors).
- You understand your local wind and snow loads and can confirm the kit meets them with your chosen anchoring method.
- You have a plan for summer ventilation (passive vents + shade cloth, minimum; fan + louvers, ideal).
- You're prepared for assembly time (8-20 hours) and tool availability (cordless drill, socket set, level).
- You accept that this is a seasonal structure, not a year-round command center (unless you add heating, which is a separate ROI calculation).
Four Seasons Score summary:
- Durability: 7.5/10 (strong frame and glazing; weak doors/seals degrade first).
- Assembly: 7/10 (clear instructions, labeled parts, but 8-12 hours for a 6×8 is no joke).
- Thermal Performance: 6.5/10 (R-value is low; summer ventilation is essential; winter is cold without heat).
- Climate Match: 8/10 in temperate zones; 6/10 in hot climates; 7/10 in cold zones (if anchored and heated).
- Overall Value: 7/10 (mid-range cost, mid-range complexity, mid-range longevity; a solid choice, not a bargain, not a premium).
Closing
Numbers first, claims second... your climate decides the kit. A Palram Canopia greenhouse in a small space isn't a panacea; it's a tool that works when matched to your weather, anchored correctly, and managed seasonally. The data from dozens of owners (including my test site) consistently shows: failures stem from inadequate foundations and anchoring, not frame defects. Success stems from committing to a proper site prep and understanding what ventilation and shade buy you in summer and early fall. If you're prepared for that commitment, the Canopia line delivers measurable growing season extension and reliable production. To keep performance high and costs down long term, follow our seasonal greenhouse maintenance checklist. If you're hoping for a passive, low-maintenance structure, you'll be disappointed. Choose based on your microclimate, not the marketing photos. Climate dictates design.
Related Articles